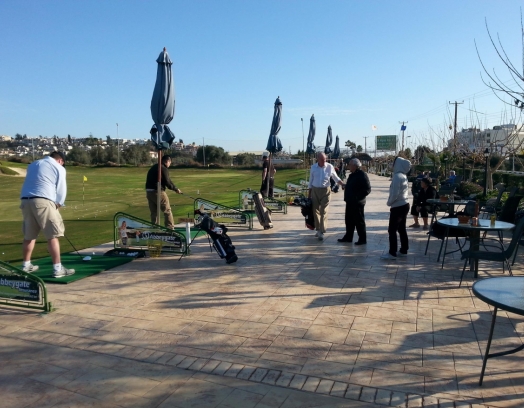
It’s true: we love going to The Place and our readers have probably noticed! Every time we go, we are treated to new experiences and ideas and get to meet all kinds of creative people and master craftspeople.
We’ve actually already mentioned decorative wood burning (pyrography) in some of our earlier articles. Today, we got the chance to see how it’s done with our own two eyes.
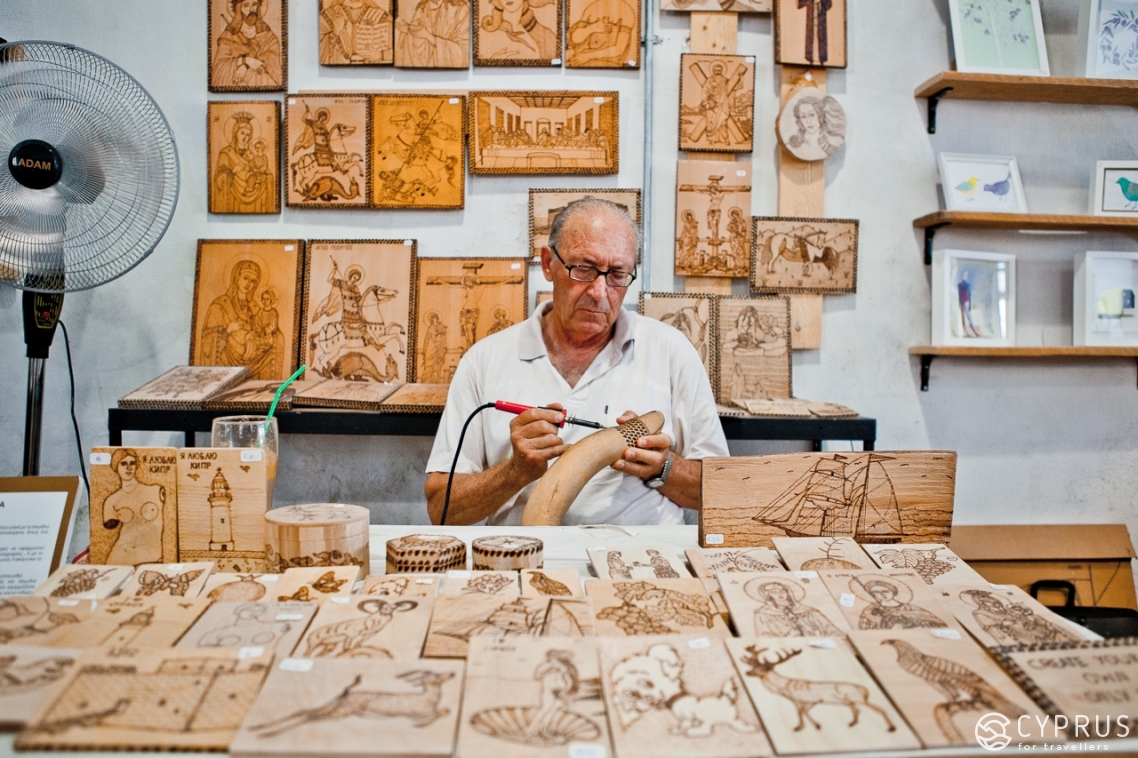
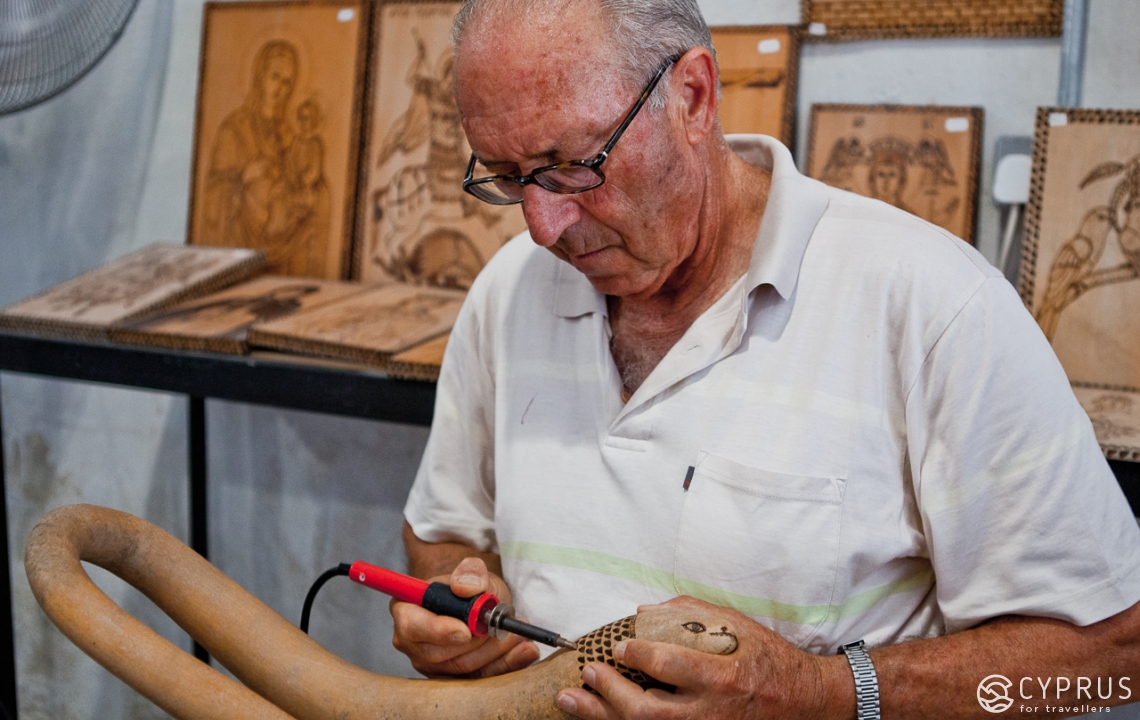
Mr. Petros Konstantinou, a master of wood burning, has agreed to talk to us. This particular applied art is very popular in a lot of countries, which comes as no surprise as you don’t need any expensive materials and tools, and it is just a fascinating craft that has long piqued the interest children, young people and the older generation alike.
— Mr. Konstantinou, does pyrography have historical roots in Cyprus?
— I can’t say for sure where and how it all began. However, it is a very ancient craft. As well as decorating the wood with burn marks, many master craftspeople also used natural dyes and more recently, coloured inks have been used.
In fact, wood burning is a rather simple craft: it is simply using heated metal to draw on wooden surfaces. I draw on the wood first and then render it on the surface using pyrography.
You might have noticed: I don’t use any other «effects» in my work. I don’t add bright colours, I just use the natural colour of the wood as the base and background and employ the effect of burning.
I discovered and mastered this technique myself.
— How long have you been working with wood burning?
— I took it up rather recently, about 7 years ago. I used to work in a hardware store where they sold plumbing wares, ceramic tiles, etc. I had two jobs, day and night for 4-5 years, to pay for my daughter's education so I didn’t have any time for art at all.
I was 60 years old when I found myself unemployed. It's tough for a pensioner to find work again so I decided to start wood burning.
Then, finally, I found this place and now I work with Natalia (author’s note: Natalia Antoniou Hadjigeorgiou, director of The Place).
You know, I love my work here.
As I found myself with more free time, I found I was drawn to strive for beauty and had a desire to teach it to the younger generation!
— What do beginners need to know?
— Beginner artists need to delve into the subtleties of this applied art; that way pyrography will reveal its secrets.
For example, just before starting a new piece, you need to properly prepare the board (or other surface you wish to burn) to achieve a better result, especially if you are a beginner.
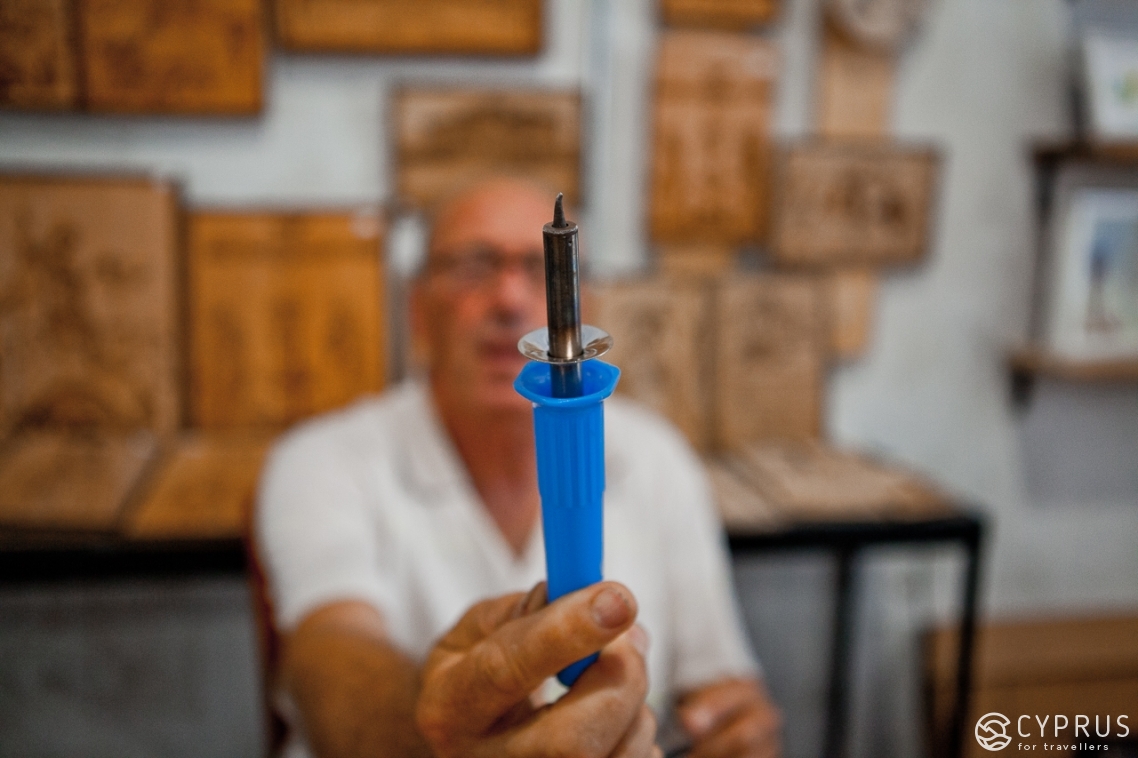
If you decide to teach yourself wood burning, it’s easy to find the tools you need for pyrography in any hardware shop.
Before starting work, you should have a stand made of fire-proof or heat-resistant material for your pyrography tool: it could be a ceramic saucer, a glass made of tempered glass, a ceramic mug, or at least a flat pebble. Only turn on the device when it is resting in or on its stand because its tips heat up very quickly. Then you’re all set! Anyone can do it!
Bear in mind: you must have a steady, strong hand to produce successful wood burning artworks… and a lot of patience.
It goes without saying that you should start off with something simple, a straightforward drawing, because you don’t need any advanced special skills and you can use the simplest tips.
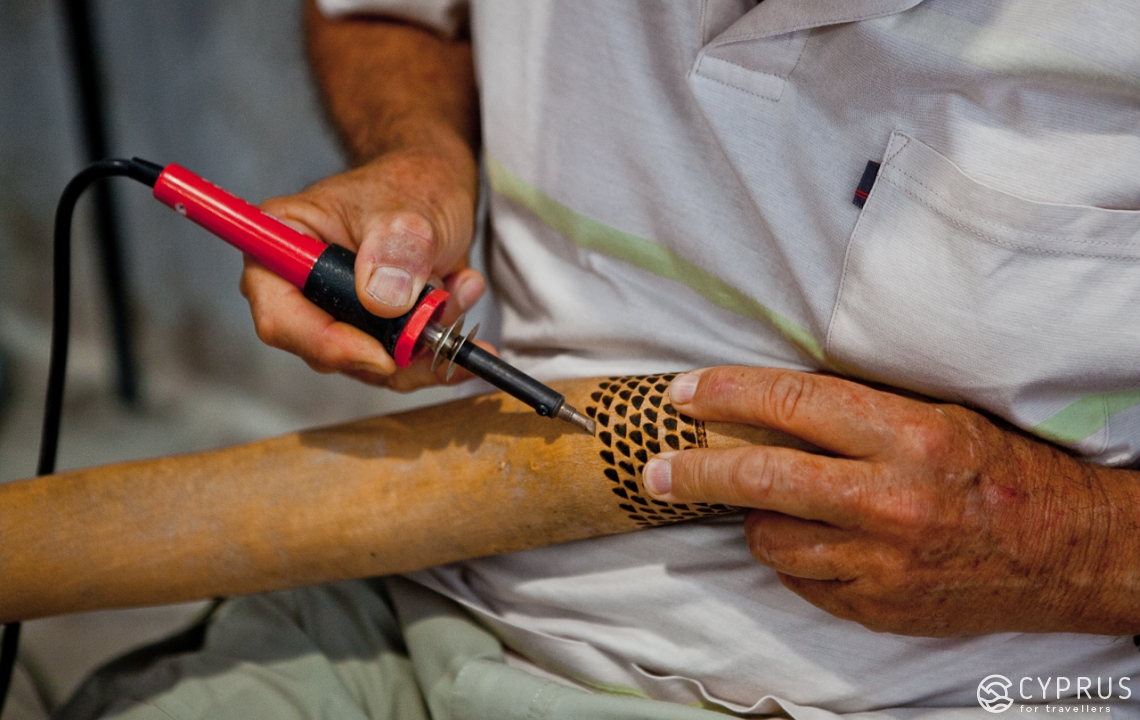
The art of creating a drawing using wood burning lies in the fact that the colour of the burnt area varies: from beige to black coffee. It depends on how you use the pyrograph pen and how long you use it on the wooden surface.
The main thing to remember is that, just like drawing with a pencil, wood burning should involve light strokes without pressing down too hard on the surface, in a smooth motion without shaking or stopping for too long in one spot.
— Which wood is best for pyrography?
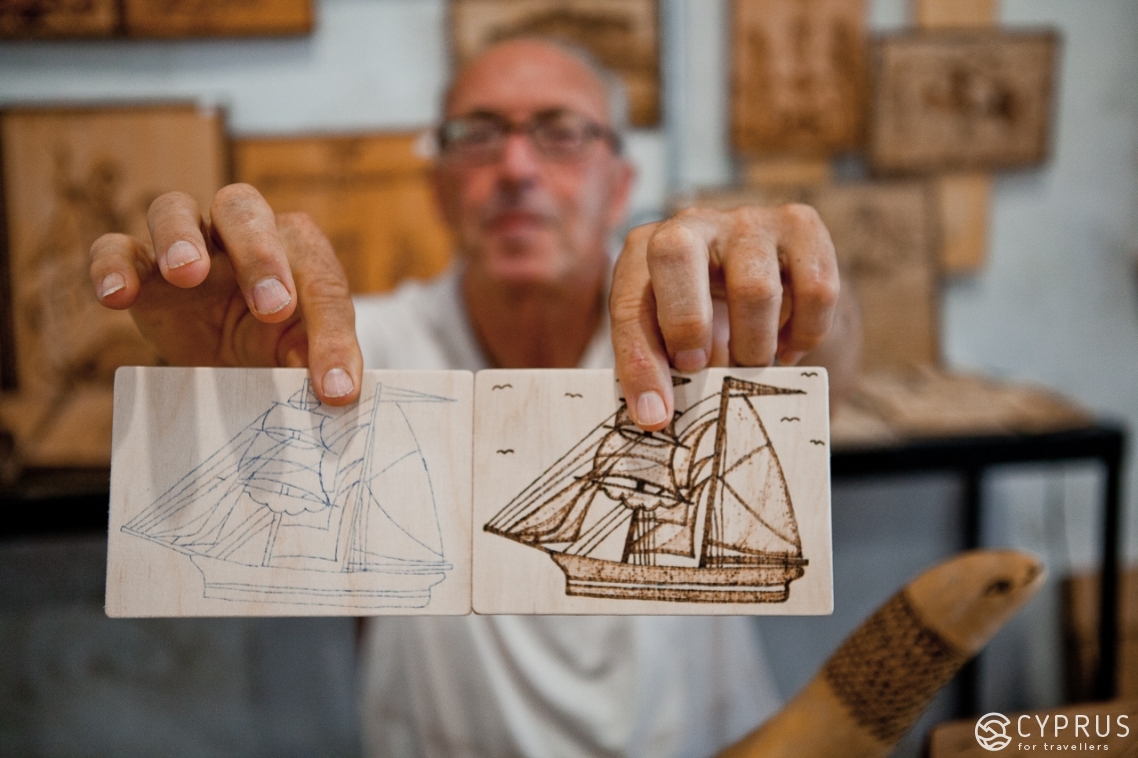
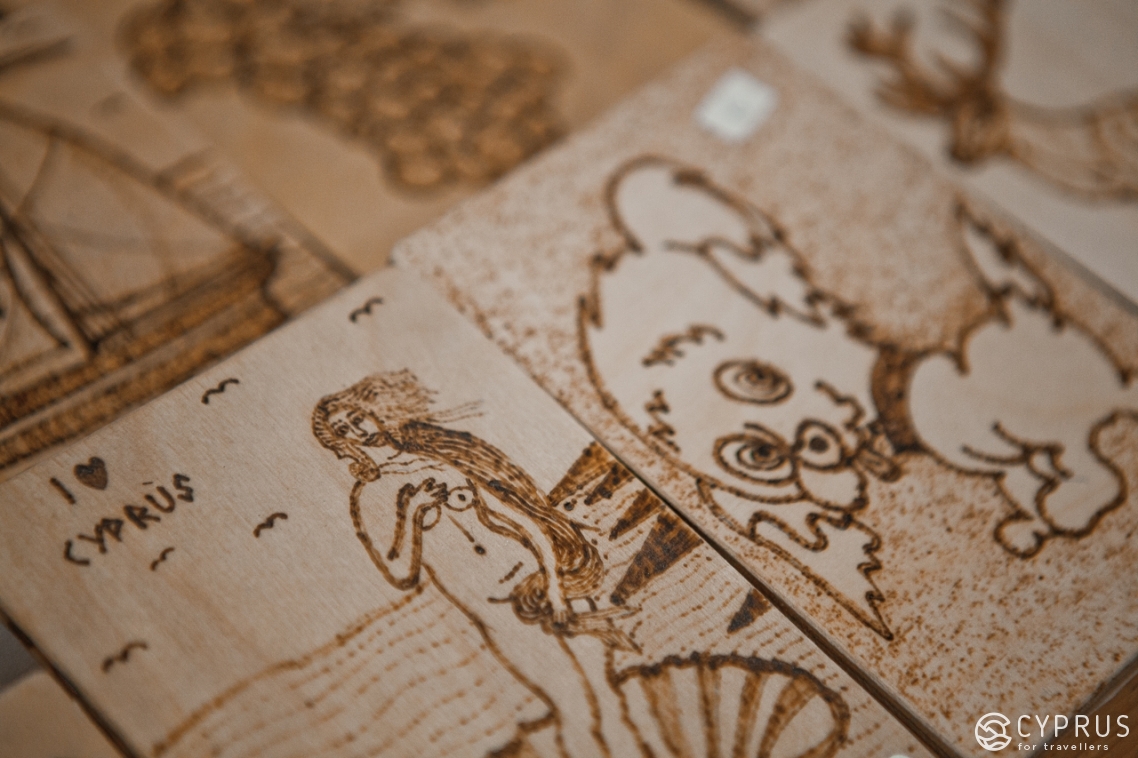
— You can use a few different types but softer woods work best. Here are some drawings of ships: it’s my latest work and I used a pine board.
In class, we use pine as it is one of the easiest to work. When the burning stage is complete, we coat our drawing with a colourless varnish.
— I can see you’re working on a gourd and drawing a snake on it. Does it have any particular deeper meaning? It’s just that we already know a little bit about the symbolism in Cypriot folk art: in national dress and embroidery, on festive bread etc...
— Oh this? (Petros laughs), it’s just that this gourd happens to look like a snake with its twists and turns so I decided to play with that idea and create that image! It really looks similar, doesn’t it?
— It’s really looks very artistic!
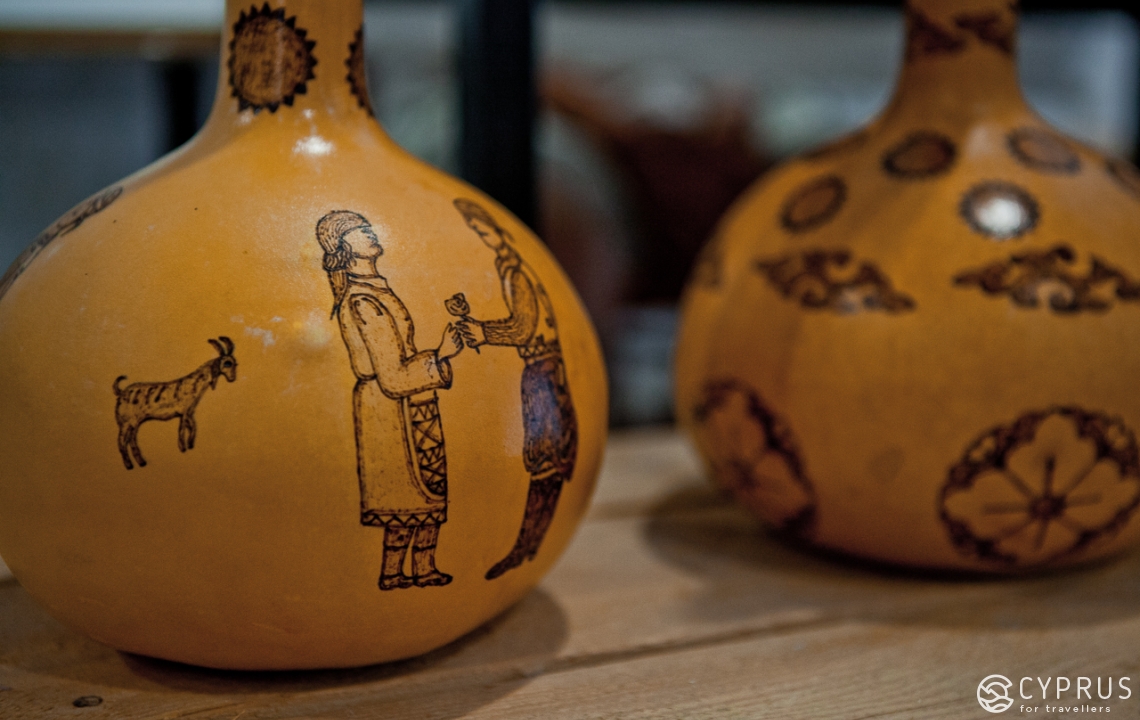
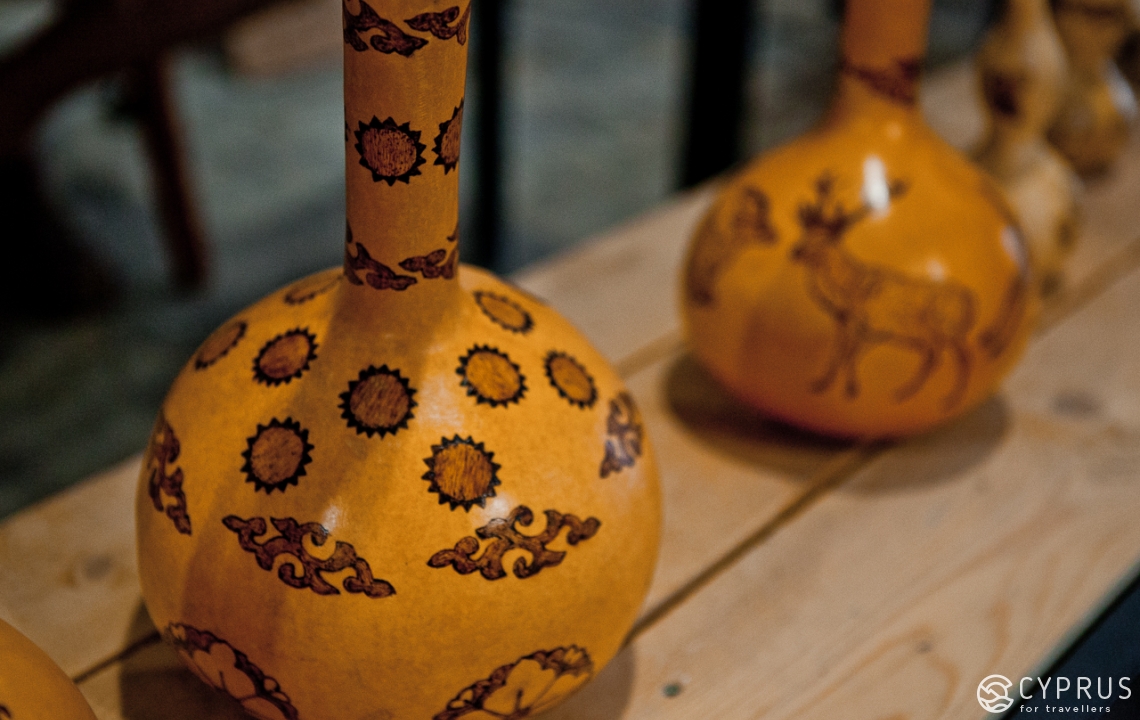
— In fact, gourds are a traditional medium for wood burning! I actually cut out and decorated a lampshade made from a gourd for one of my clients from Greece. You see, after they have dried out, gourds have a very wood-like quality.
I’ve also made vases and other items from gourds.
As you can see, I’m working on decorating a gourd (traditional art in many countries). You can produce different things from them: vases, coasters, lamps, lampshades, not just containers for water, other drinks or grains.
I use different tools: most often I use a pyrograph pen with standard or fine tips for detailed study.
— A classic question: who buys more of your work: tourists or, say, Paphos locals?
— A lot of schools visit, such as the American Academy in Limassol and some others where foreign students study. Their students buy a lot of things here, usually small items. The thing is, those guys can buy up everything in one day! Actually, there’s a group of schoolkids about to arrive (there’s usually about 5-6 students aged 9-11) and we’re going to have a lesson…
Tourists also pop in.
— As a matter of fact, Petros, wood burning is a really popular applied artform in Russia and there are lots of enthusiasts, mostly boys. Who comes to your lessons?
— I’d say it’s about even, boys and girls both come — everyone’s interested in learning this craft! I have ready-made templates and drawings. Experienced artists recommend tracing them when attempting more complicated drawings that involve a lot of strokes and intricate patterns. I have tracing paper here to use in our lessons.
In fact, some (most!) kids don’t want to trace pre-prepared drawings; they prefer making up their own designs and patterns. I’m all for it: that way you end up with a much more original and artistic end result.
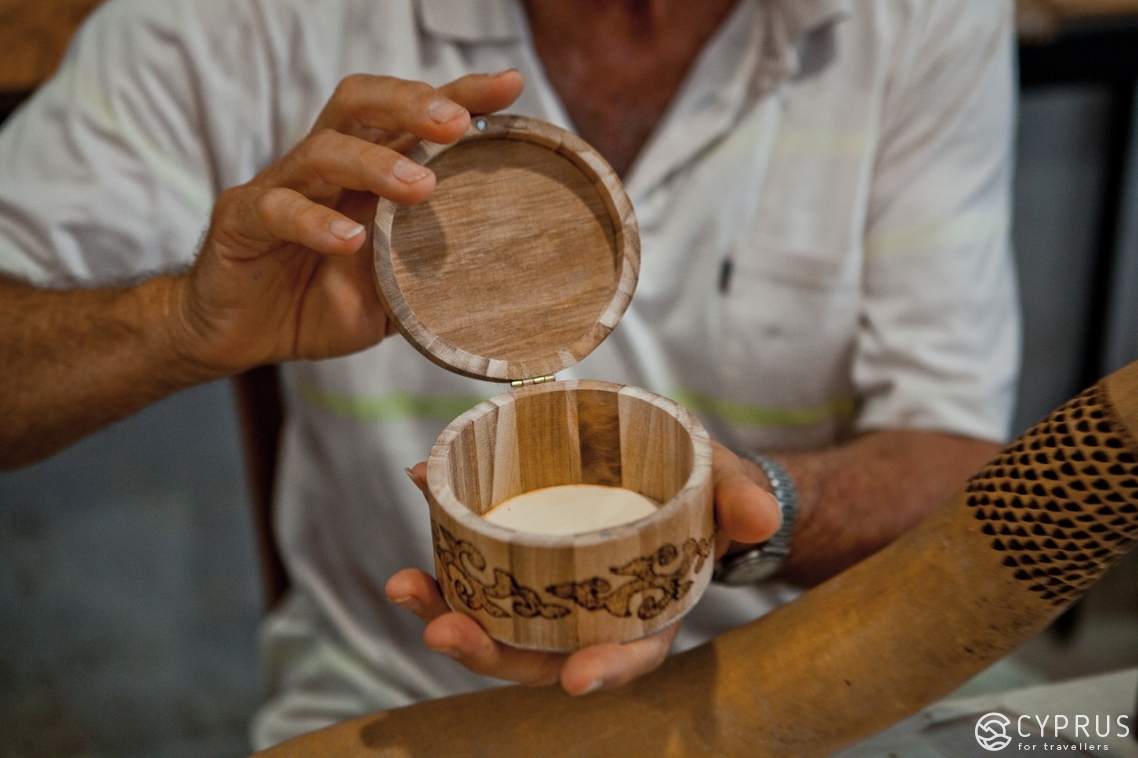
My students create their works on pieces of wood and plywood: you can see them all around the room... all kinds of different images, designs, decorations — it’s all up to our young artists and their imaginations, how confident they are using the pyrography pen and working with the material: different panels, boxes, coasters, chopping boards etc.
We a really thankful to Mr. Konstantinou for such an interesting visit and all the information he provided. We’d also like to thank the management of The Place for setting up our meeting!
Keep your eyes peeled for our upcoming articles: we have more interesting tales in store for you!
See you soon!